
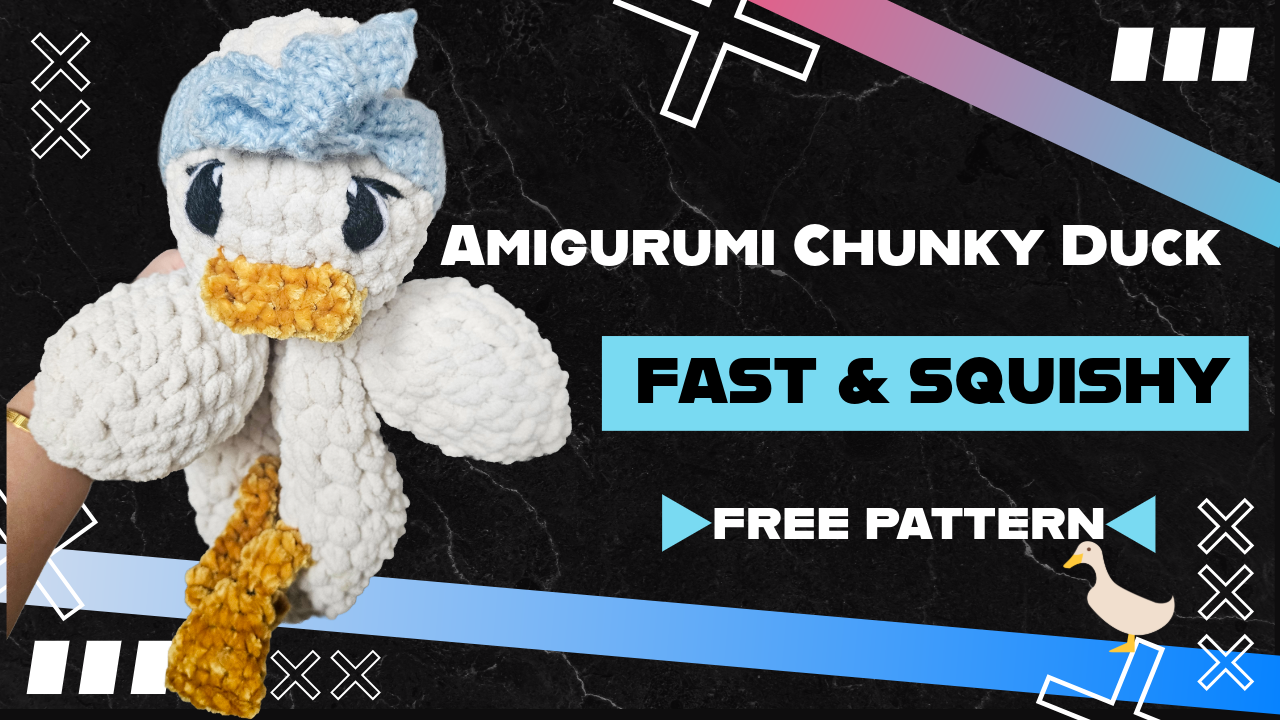
This chunky crochet duck is soft, round, and wonderfully squishy—the kind of amigurumi project that instantly makes you smile. 🐥
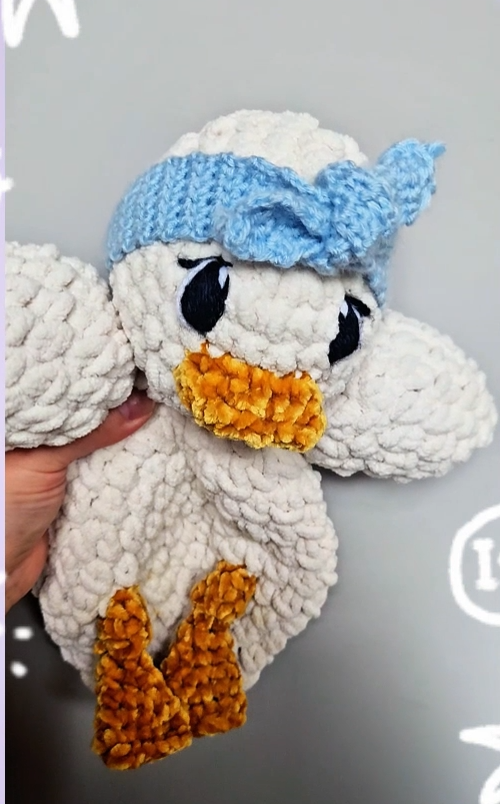
Made mainly with super bulky chenille yarn, it works up much faster than a small, tightly stitched amigurumi. The finished duck features a puffy half-double-crochet body, dimensional wings and feet, a surface-crocheted beak, embroidered anime-style eyes, and a removable blue headband.
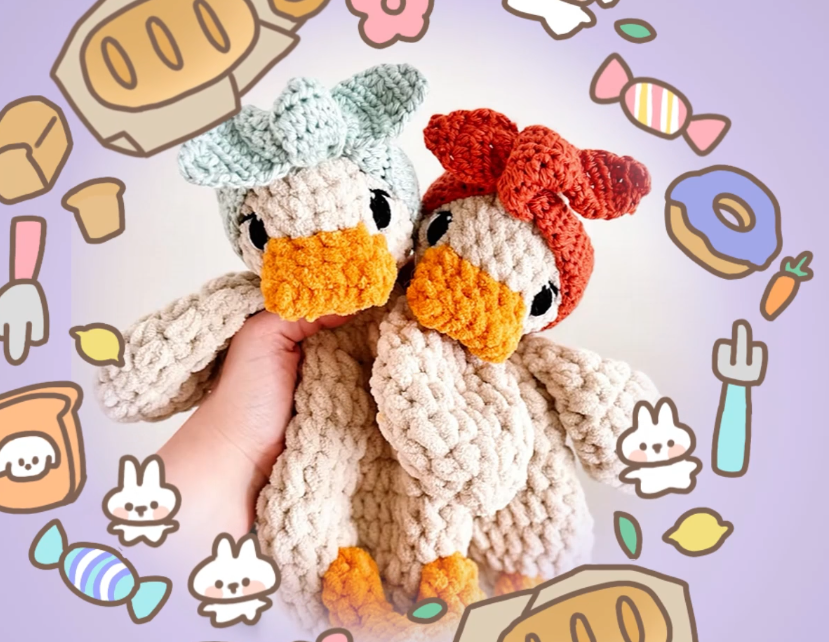
The written pattern below will help you follow the construction and stitch counts. For the surface crochet, shaping, assembly, and eye embroidery, I recommend watching the video so you can see the placement clearly:
▶️ [Watch the complete chunky crochet duck tutorial on YouTube](https://youtu.be/hFfHkip6E3o)
Project Overview
- Skill level: Beginner to advanced beginner
- Terminology: US crochet terms
- Construction: Head and body are worked as one piece
- Main techniques: Magic ring, single crochet, half double crochet, increases, decreases, surface crochet, sewing, and embroidery
Materials
For the duck shown in my tutorial, I used:
- Super bulky Size 6 chenille or blanket yarn in white for the head, body, and wings
- Super bulky Size 6 yarn in mustard yellow for the beak, legs, and feet
- Medium Size 4 worsted yarn in light blue for the headband
- Black and white worsted yarn for the embroidered eyes
- 7 mm crochet hook
- 8 mm crochet hook
- 4 mm crochet hook
- Polyfill stuffing
- Tapestry needle
- Scissors
- Stitch marker
You can easily change the personality of your duck by using cream, pale yellow, pink, or another soft color for the body. A striped or multicolored headband would also be adorable. 🧶
Abbreviations
- MR: Magic ring
- SC: Single crochet
- HDC: Half double crochet
- Inc: Work 2 single crochets in one stitch
- Dec: Single crochet 2 stitches together
- HDC-Inc: Work 2 half double crochets in one stitch
- HDC-Dec: Half double crochet 2 stitches together
- Sl st: Slip stitch
- Ch: Chain
- St/Sts: Stitch/Stitches
Head
Use the 7 mm hook and white chenille yarn.
- Round 1: Work 6 SC into a magic ring. (6)
- Round 2: Inc in every stitch. (12)
- Round 3: Repeat (1 SC, Inc) 6 times. (18)
- Round 4: 1 SC, Inc, repeat (2 SC, Inc) 5 times, then 1 SC. (24)
- Rounds 5–7: SC around. (24)
- Round 8: 5 SC, 2 Inc, 6 SC, 2 Inc, 9 SC. (28)
- Round 9: Repeat (5 SC, Dec) 4 times. (24)
- Round 10: 1 SC, Dec, repeat (2 SC, Dec) 5 times, then 1 SC. (18)
- Round 11: Repeat (1 SC, Dec) 6 times. (12)
- Round 12: Dec around. (6)
Firmly stuff the head before completing the final decreases. Keep the shape rounded, but avoid overstuffing so much that the stitches stretch apart.
Do not fasten off—the body continues directly from the head.
Puffy Body
Switch to the 8 mm hook and continue with white yarn.
- Round 13: HDC-Inc in every stitch. (12)
- Round 14: Repeat (1 HDC, HDC-Inc) 6 times. (18)
- Round 15: Repeat (2 HDC, HDC-Inc) 6 times. (24)
- Rounds 16–17: HDC around. (24)
- Round 18: Repeat (3 HDC, HDC-Inc) 6 times. (30)
- Rounds 19–20: HDC around. (30)
- Round 21: Repeat (3 HDC, HDC-Dec) 6 times. (24)
- Round 22: Repeat (2 HDC, HDC-Dec) 6 times. (18)
- Round 23: HDC around. (18)
- Round 24: Repeat (1 HDC, HDC-Dec) 6 times. (12)
- Round 25: HDC-Dec around. (6)
- Round 26: HDC around. (6)
Add stuffing gradually as the opening becomes smaller. The body should feel plump and squishy without becoming rigid.
Fasten off, weave the yarn tail through the front loops of the remaining stitches, and pull gently to close.
Wings
Make two with the 8 mm hook and white yarn.
- Round 1: Work 5 SC into a magic ring. (5)
- Round 2: HDC-Inc in every stitch. (10)
- Round 3: Repeat (1 HDC, HDC-Inc) 5 times. (15)
- Rounds 4–6: HDC around. (15)
- Round 7: Repeat (1 HDC, HDC-Dec) 5 times. (10)
- Round 8: Dec around. (5)
Fasten off and leave a long tail for sewing. The wings do not need heavy stuffing; keeping them soft allows them to rest naturally against the body.
Sew one wing to each side near body Rounds 13–14. Pin both wings in place before sewing to check that they sit at the same height.
Surface-Crocheted Beak
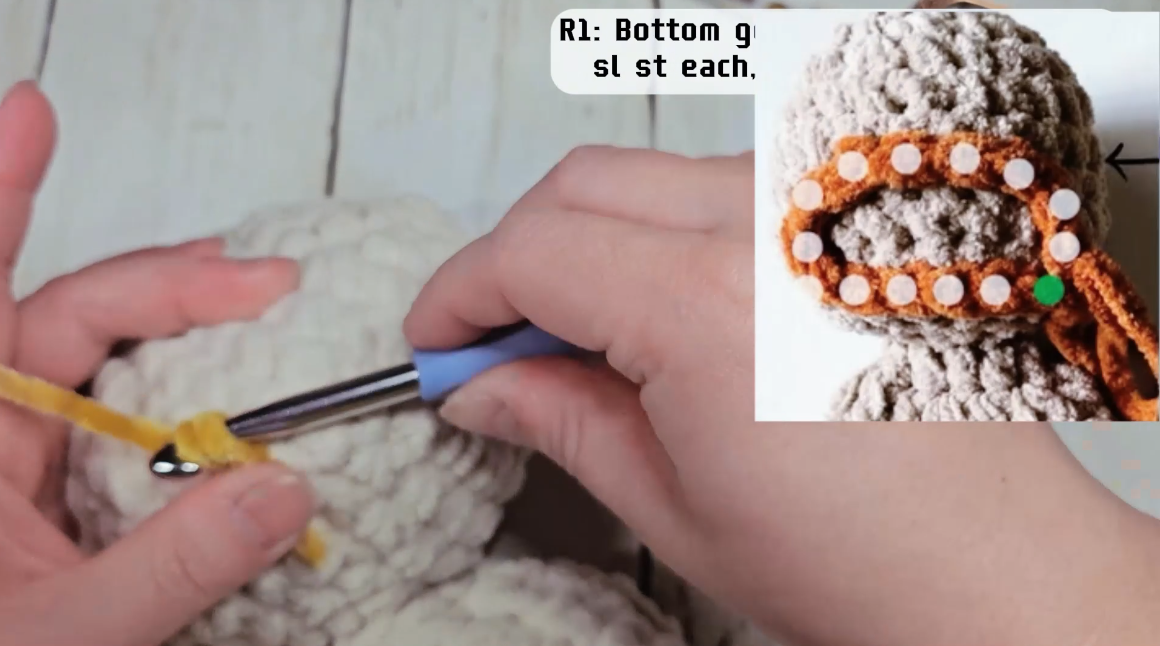
Use the 7 mm hook and mustard yarn.
Surface crochet an oval directly onto the face between approximately Head Rounds 7–9:
- 6 slip stitches along the bottom
- 2 slip stitches on each side
- 4 slip stitches across the top
You should have 14 stitches around the oval.
- Rounds 2–3: Work 14 SC around. (14)
Do not stuff the beak. Fasten off, flatten the opening, and whip stitch through the front loops to close it.
Surface crochet can be difficult to position from written instructions alone. Watch the video before attaching the yarn so you can see exactly where the oval begins and how it remains centered:
▶️ [See the beak placement in the video tutorial](https://youtu.be/hFfHkip6E3o)
Feet and Legs
Make two using the 7 mm hook and mustard yarn.
Foot
- Round 1: Work 4 SC into a magic ring. (4)
- Round 2: Repeat (1 SC, Inc) twice. (6)
- Round 3: Repeat (2 SC, Inc) twice. (8)
- Round 4: Repeat (3 SC, Inc) twice. (10)
- Round 5: Repeat (4 SC, Inc) twice. (12)
- Round 6: SC around. (12)
- Round 7: Slip stitch across the top to close the foot. (6 slip stitches)
Fasten off.
Leg
Surface slip stitch 5 stitches across the upper section of the foot.
- Rounds 2–3: Work 5 HDC. (5)
Do not stuff the legs. Fasten off and leave a tail for sewing.
Attach the legs around Body Rounds 20–21. Before sewing securely, stand or hold the duck upright to check that the feet point in the same direction.
Crochet Headband
Use the 4 mm hook and light blue worsted yarn.
- Row 1: Ch 3. Starting in the second chain from the hook, work 2 SC. Ch 2 and turn. (2)
- Row 2: Inc twice. Ch 1 and turn. (4)
- Row 3: Inc, 2 SC, Inc. Ch 1 and turn. (6)
- Rows 4–42: Work 6 SC. Ch 1 and turn. (6)
- Row 43: Dec, 2 SC, Dec. Ch 1 and turn. (4)
- Row 44: Dec twice. (2)
Fasten off and tie the headband around the duck’s head.
Because yarn tension varies, check the length against your duck before completing the tapered end. Add or remove repeated rows if necessary.
Finishing the Face
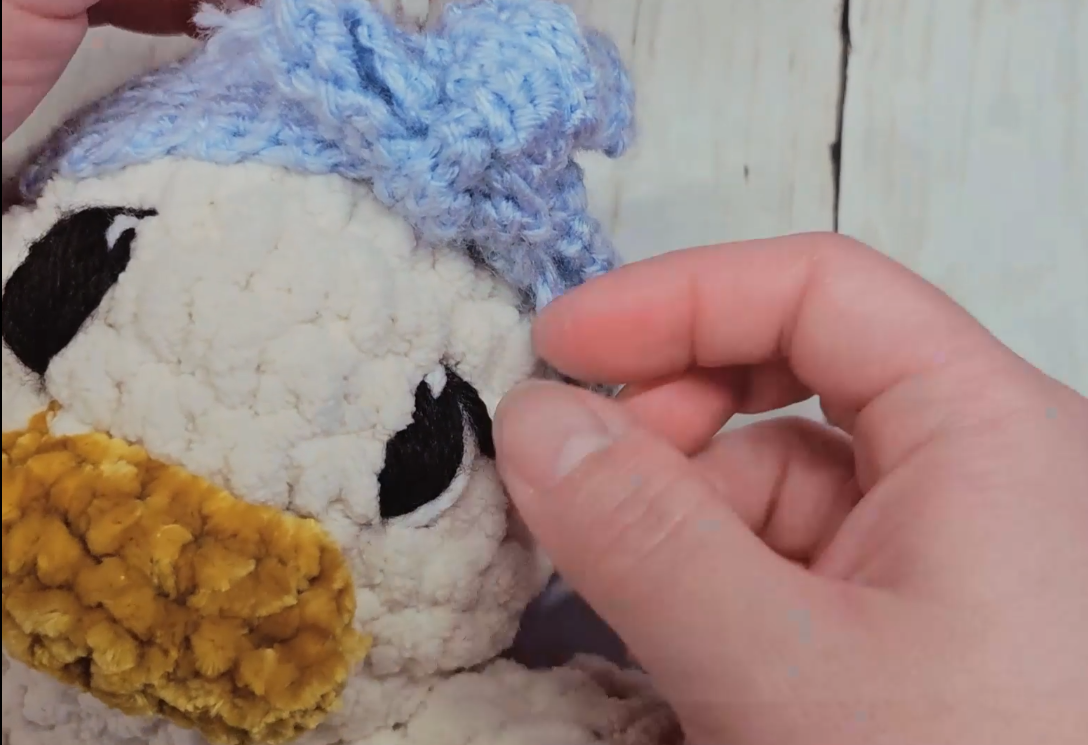
Use black yarn to embroider a thick vertical oval for each eye, beginning around Head Round 5 and extending approximately two rounds in height.
Add a small white outline or highlight along the lower outer edge of each black eye. This little contrast creates the bright anime-inspired expression. ✨
Before stitching permanently, mark both eye positions with pins or short pieces of contrasting yarn. Check the face from the front and from above to make sure the eyes are balanced.
Helpful Tips
- Chenille stitches can be difficult to see, so move your stitch marker at the end of every round.
- Use the smaller 7 mm hook for the head to create a slightly firmer fabric.
- The 8 mm hook gives the HDC body its softer, puffier appearance.
- Add stuffing in small pieces rather than one large bundle.
- Do not overstuff the beak, wings, or legs.
- Pin every separate piece in position before sewing.
- If the embroidered eyes look uneven, remove the yarn and reposition them before weaving in the ends.
Make It Your Own
A few simple color changes can give this duck a completely different personality:
- Pale yellow body with an orange beak
- Cream body with a dusty rose headband
- White body with a sage green headband
- Pastel blue or lavender body for a playful nursery gift
- A striped headband made from leftover yarn
Which color combination would you choose? I would love to hear your idea. 💗
Watch the Complete Tutorial
The video demonstrates the details that are much easier to understand visually, especially the body shaping, surface-crocheted beak, leg attachment, headband fit, and eye embroidery.
▶️ [Watch Easy Crochet Duck Tutorial on YouTube](https://youtu.be/hFfHkip6E3o)
You can also explore more free crochet patterns and project ideas at [Crochetnotes Studio](https://crochetnotesstudio.com).
Pattern and tutorial by Crochetnotes. Please do not republish the complete pattern or use the tutorial images as your own. You are welcome to share your finished duck and link back to this article or the original video.
Made with yarn, shared with love. 🧶💗
Watch every stitch up close
Pair these written notes with the complete video tutorial.
Made with yarn, shared with love. 🧶💗